Creating Flags
In this lab, you will set up a CloudBees Feature Management account and use it to manage feature flags through remote configurations created in the CloudBees Feature Management dashboard.
Create a CloudBees Feature Management Account
- Open the CloudBees Feature Management portal
- Enter your user name and password to login.
- From the CloudBees Feature Management dashboard will be displayed. Create a new application by clicking the blue panel in the top left corner of the screen.
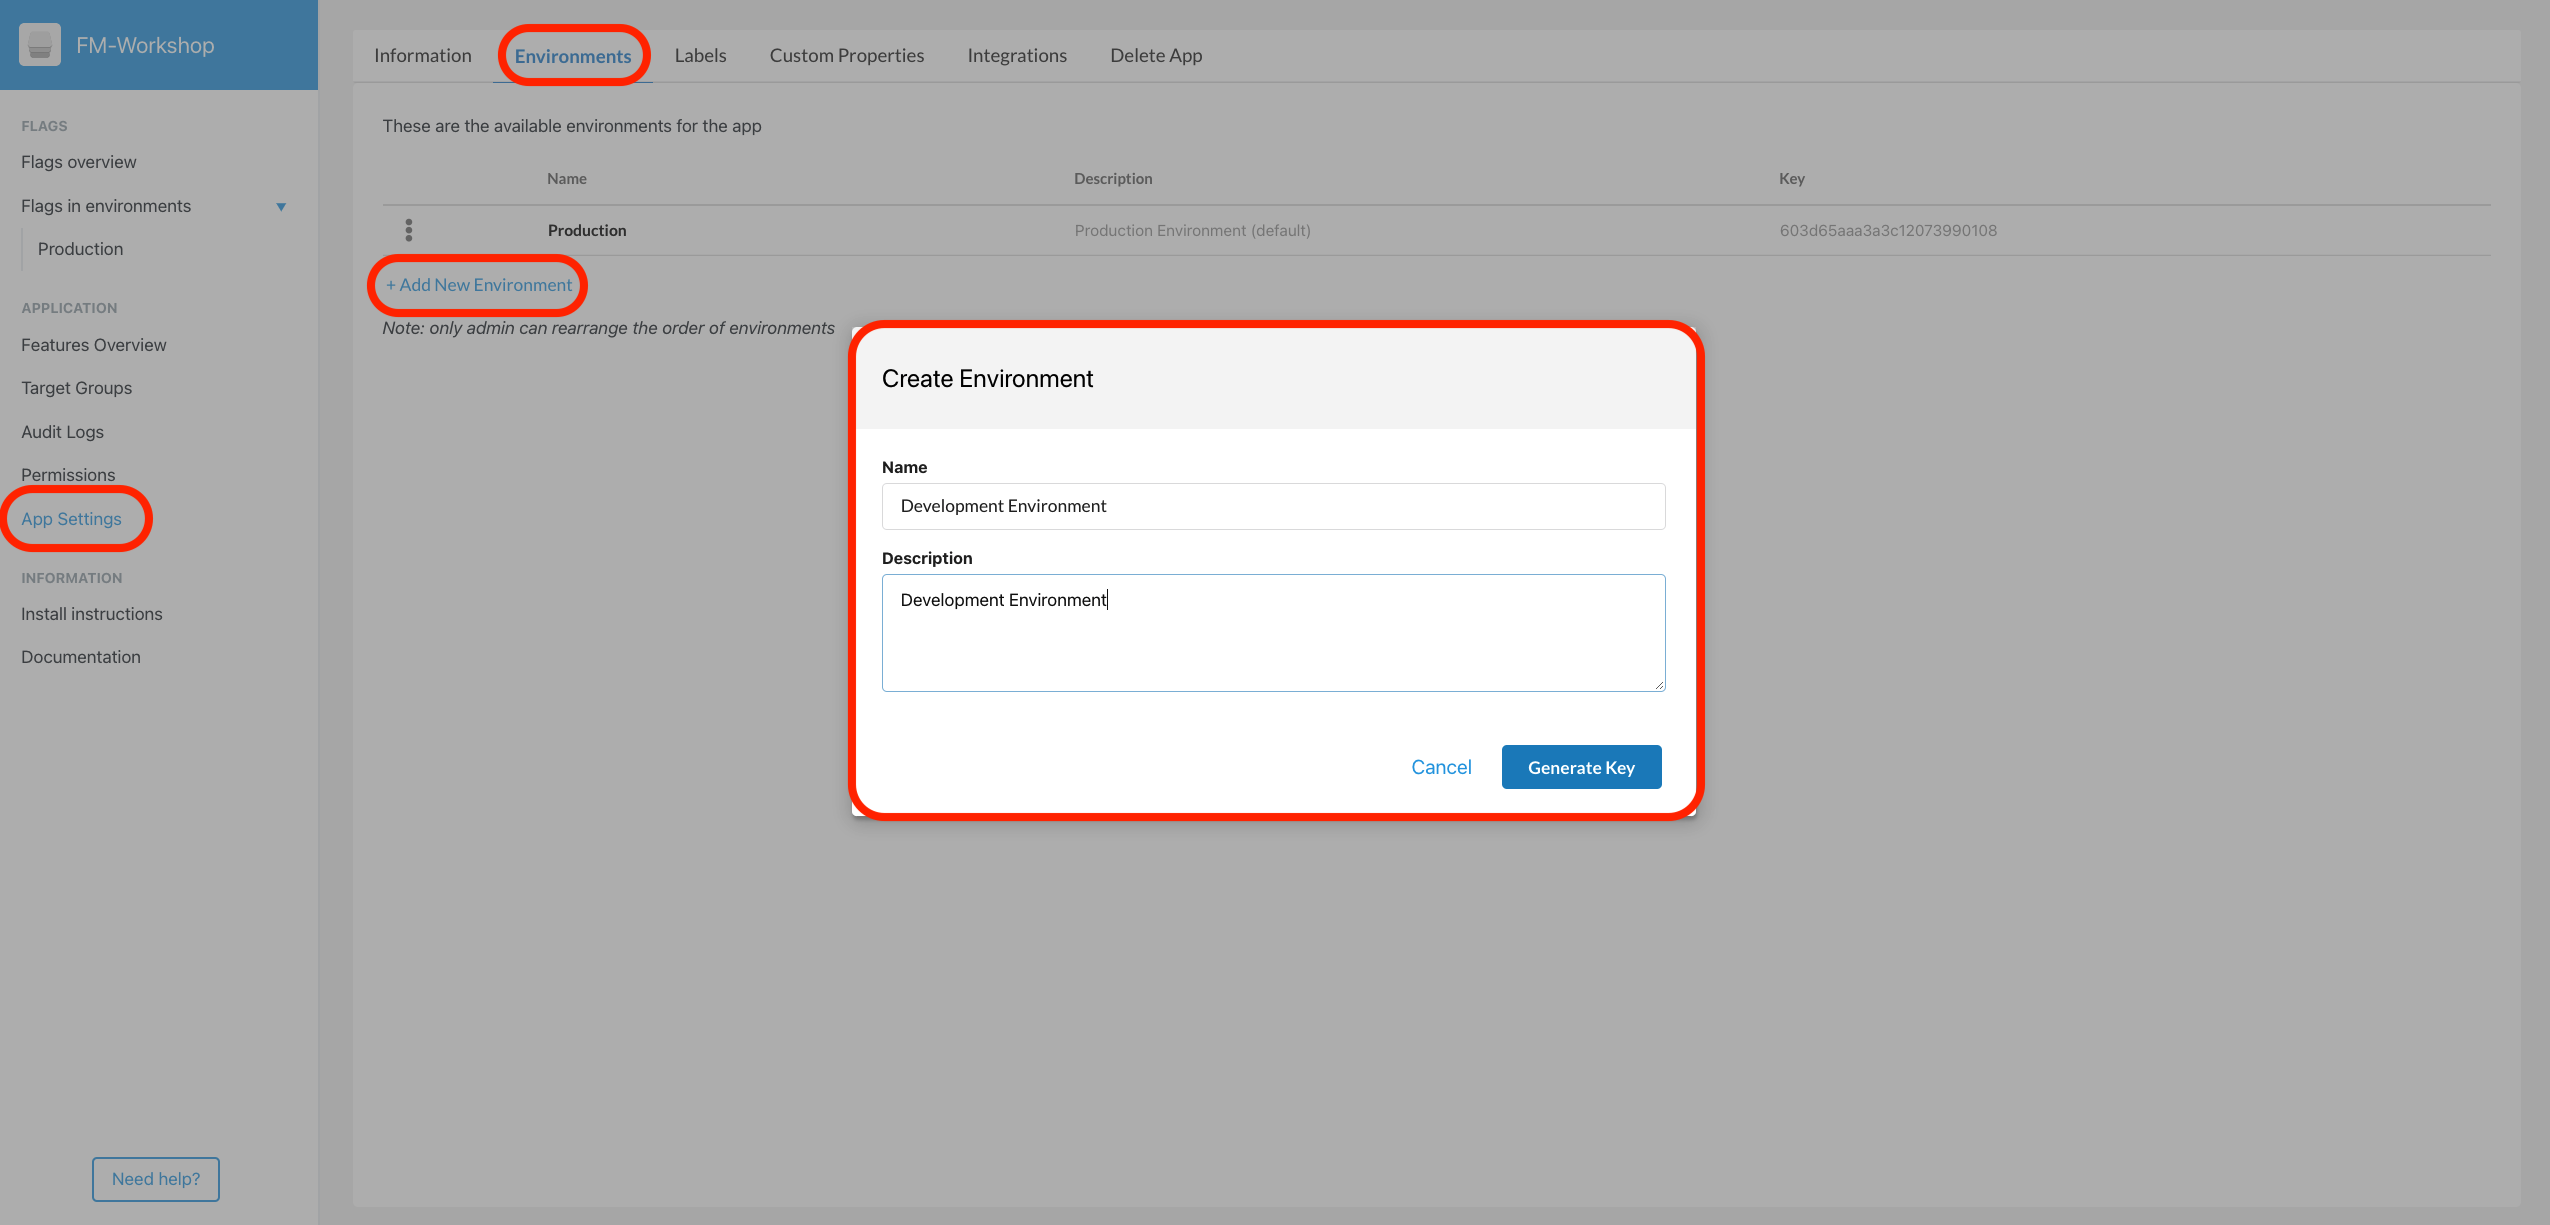
- After creating a new application in the dashboard, click the App Settings panel seen on the left hand menu. From the resulting page, select the Environments tab.
- Click Add New Environment and name it Development. Then click Generate Key.
- Close the subsequent Development Key pop-up window so that both Production and Development keys are displayed. Leave this CloudBees Feature Management dashboard tab open in the browser. Both keys will be referenced later in this lab.
API Key Environment Variable
The CloudBees CI Pipeline that will automatically build and deploy your mircroblog-frontend application uses a different CloudBees Feature Management environment key depending on which branch is deployed. Later in the workshop, we’ll learn how these separate environment keys can be used to apply the multi-environment view of the CloudBees Feature Management dashboard. This will allow a flag to have a separate and unique Production configuration from its Development environment counterpart. However, in this lab we will update a GitHub pull request between the development and main branch of your mircroblog-frontend repository.
- Open your browser to the Github Organization you created for the workshop and navigate to the microblog-frontend repository.
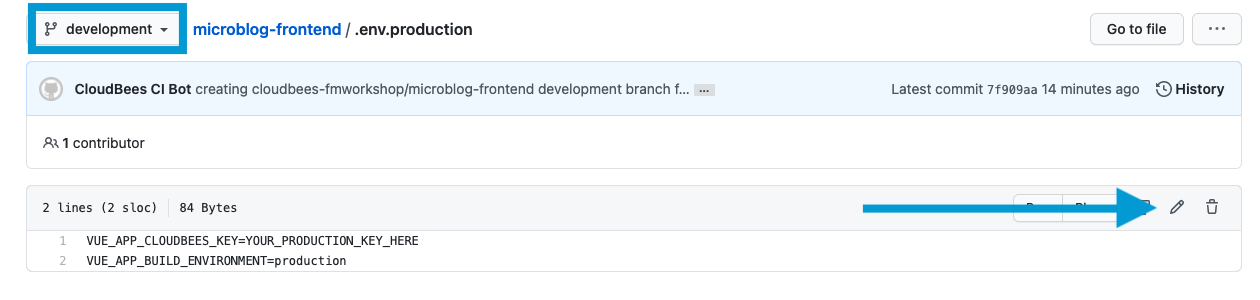
- Change the branch from main to development. After changing branches to the development branch, click on the .env.production file.
- Click the pencil icon to edit the file - again, making sure you are on the development branch.
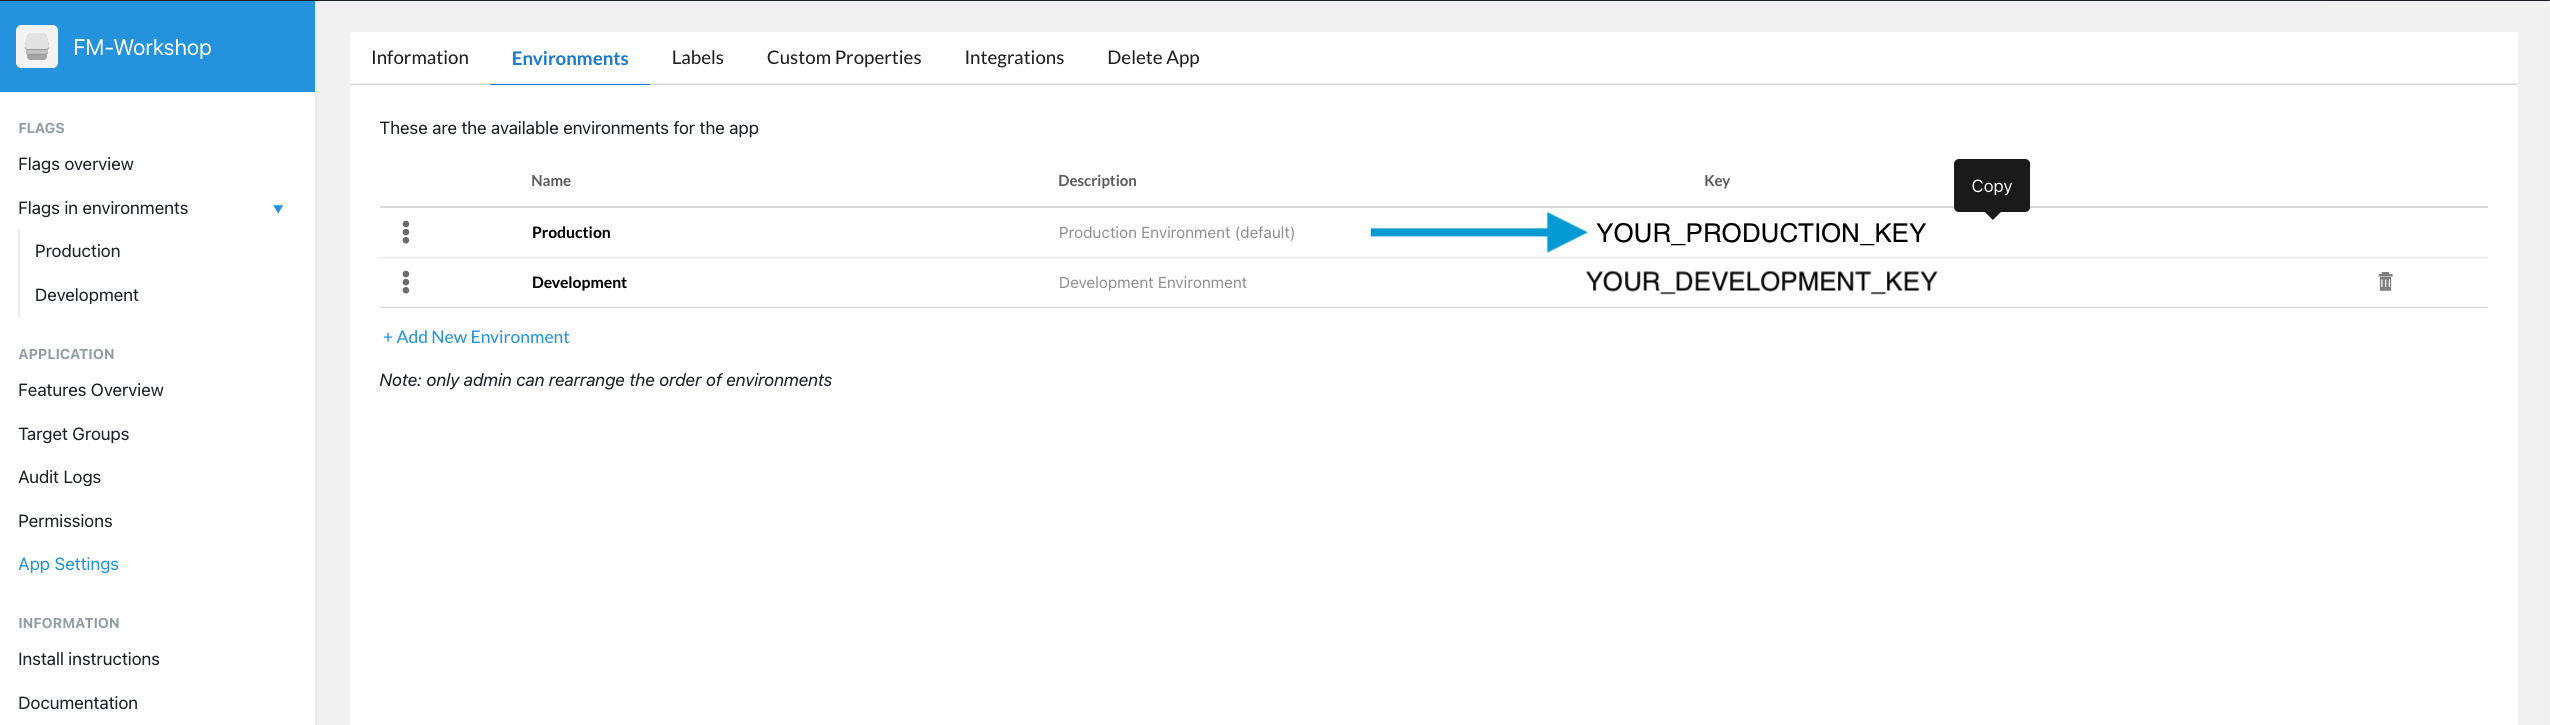
- Switch back to the CloudBees Feature Management dashboard. Copy the environment key for the Production environment by clicking on the Key value for that environment.
- Navigate back to the Github tab with the .env.production file being edited.
- Replace YOUR_PRODUCTION_KEY_HERE on Line 1 by pasting your unique Production Key value that you copied.
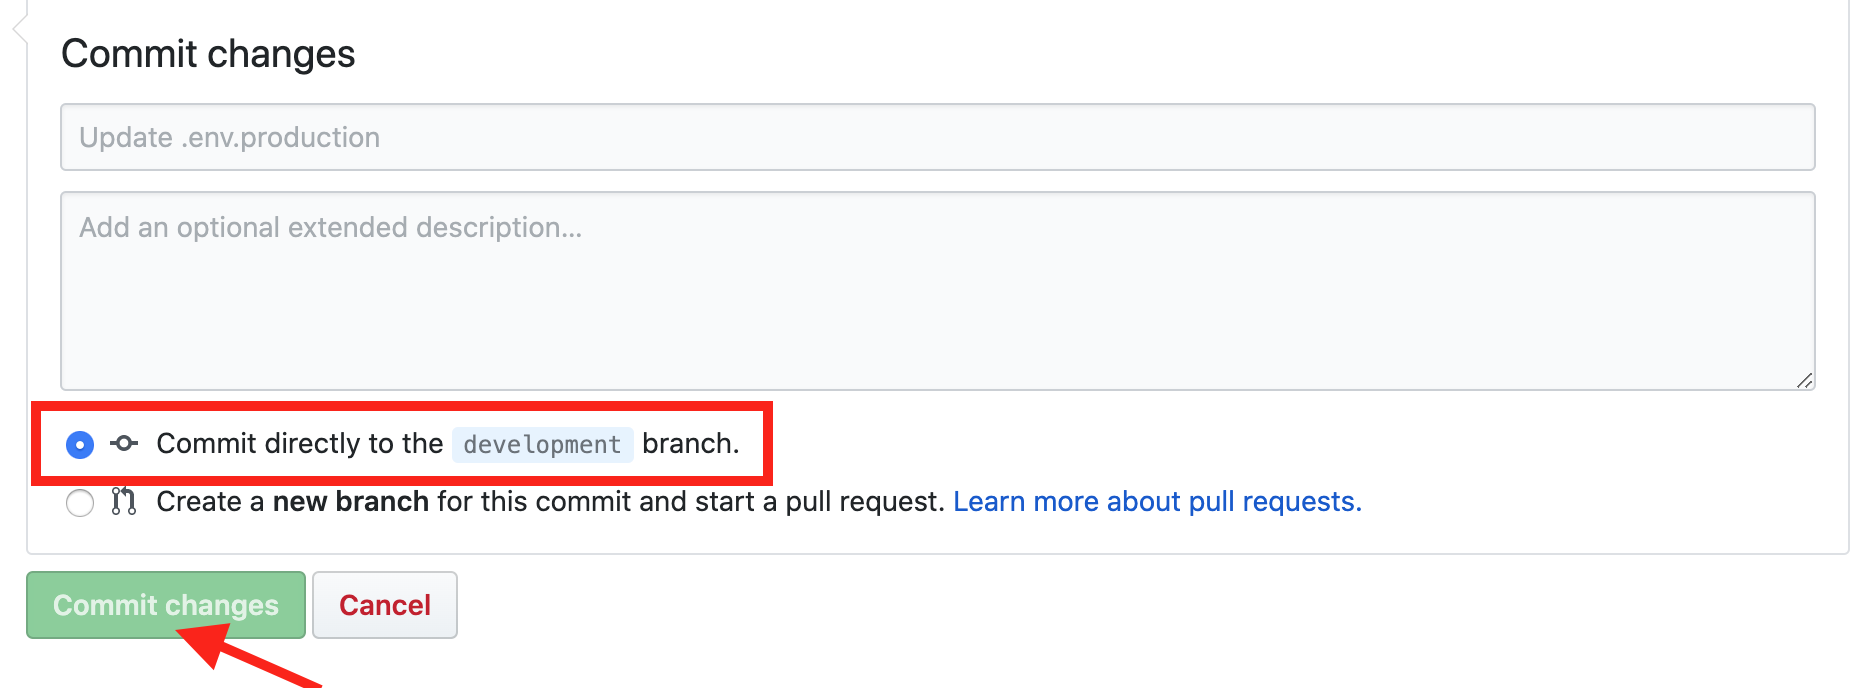
- At the bottom of the page, select Commit directly to the development branch radio button. Then click the Commit changes button.
- Navigate back to the root directory of the microblog-frontend repository (development branch). Click the .env.development file. And then select the pencil icon on the following page to make an edit to the file.
- Now, copy your Development environment Key value from the CloudBees Feature Management dashboard and then replace YOUR_DEVELOPMENT_KEY_HERE in the .env.development file with that value. Make sure you copied and replaced the value for the Development environment and the .env.development file on the development branch.
- Select the Commit the file directly to the development branch radio button, and then click Commit changes.
Create Feature Flags with CloudBees Feature Management
The flags.js file imports the relevant CloudBees Feature Management SDK and defines the feature flags (with its DEFAULT values) that an application will use. The file contains a call to the setup function that establishes a connection to the CloudBees Feature Management dashboard. The CloudBees Feature Management dashboard interface will allow for remote configuration in future labs.
- In Github, navigate to the root level of the microblog-frontend repository (ensure you are working on the development branch).
- Change directories and select the flags.js file (src\utils\flags.js) by first clicking the src folder from root view, followed by the utils folder, and finally select the subsequent flags.js file.
We will later add a component to the Posts view of the microblog application that will be gated by this new title feature flag. Click the pencil to edit the file. Define the title flag and its default value (false) by adding the following within the const Flag section after Line 4:
export const Flags = {
  sidebar: new Rox.Flag(false),
  title: new Rox.Flag(false)
}
After this edit, the flags.js should be
Click this text to expand:
import Rox from 'rox-browser'

export const Flags = {
  sidebar: new Rox.Flag(false),
  title: new Rox.Flag(false)
}

async function initCloudBees () {
  const options = {
  }

  Rox.register('default', Flags)
  await Rox.setup(process.env.VUE_APP_CLOUDBEES_KEY, options)
}

initCloudBees().then(function () {
  console.log('Done loading CloudBees Feature Management')
})
4. Commit the changes by adding a comment (e.g. “added title flag”), and select the Commit directly to the development branch radio button. And then click Commit changes.
See the Deployed Microblog Website
Once you committed the flags.js file a job will be triggered on the CloudBees CI managed controller that was provisioned for you for this workshop. That job will build and deploy your microblog-frontend application.
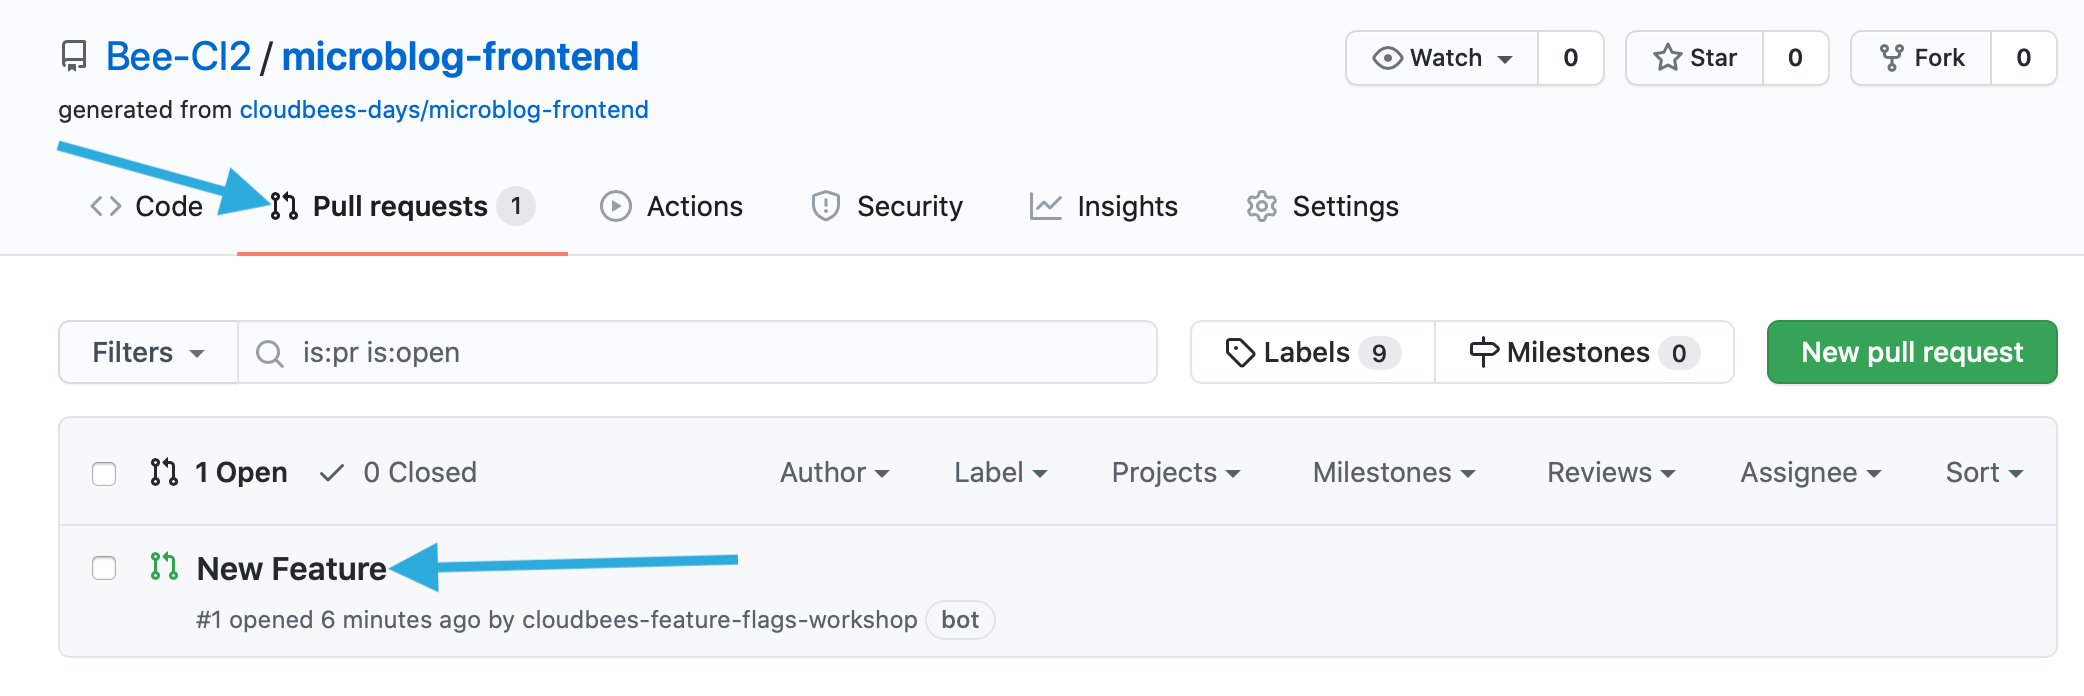
- Navigate to the microblog-frontend repository.
- Click on the Pull requests tab and the click on the New Feature pull request.
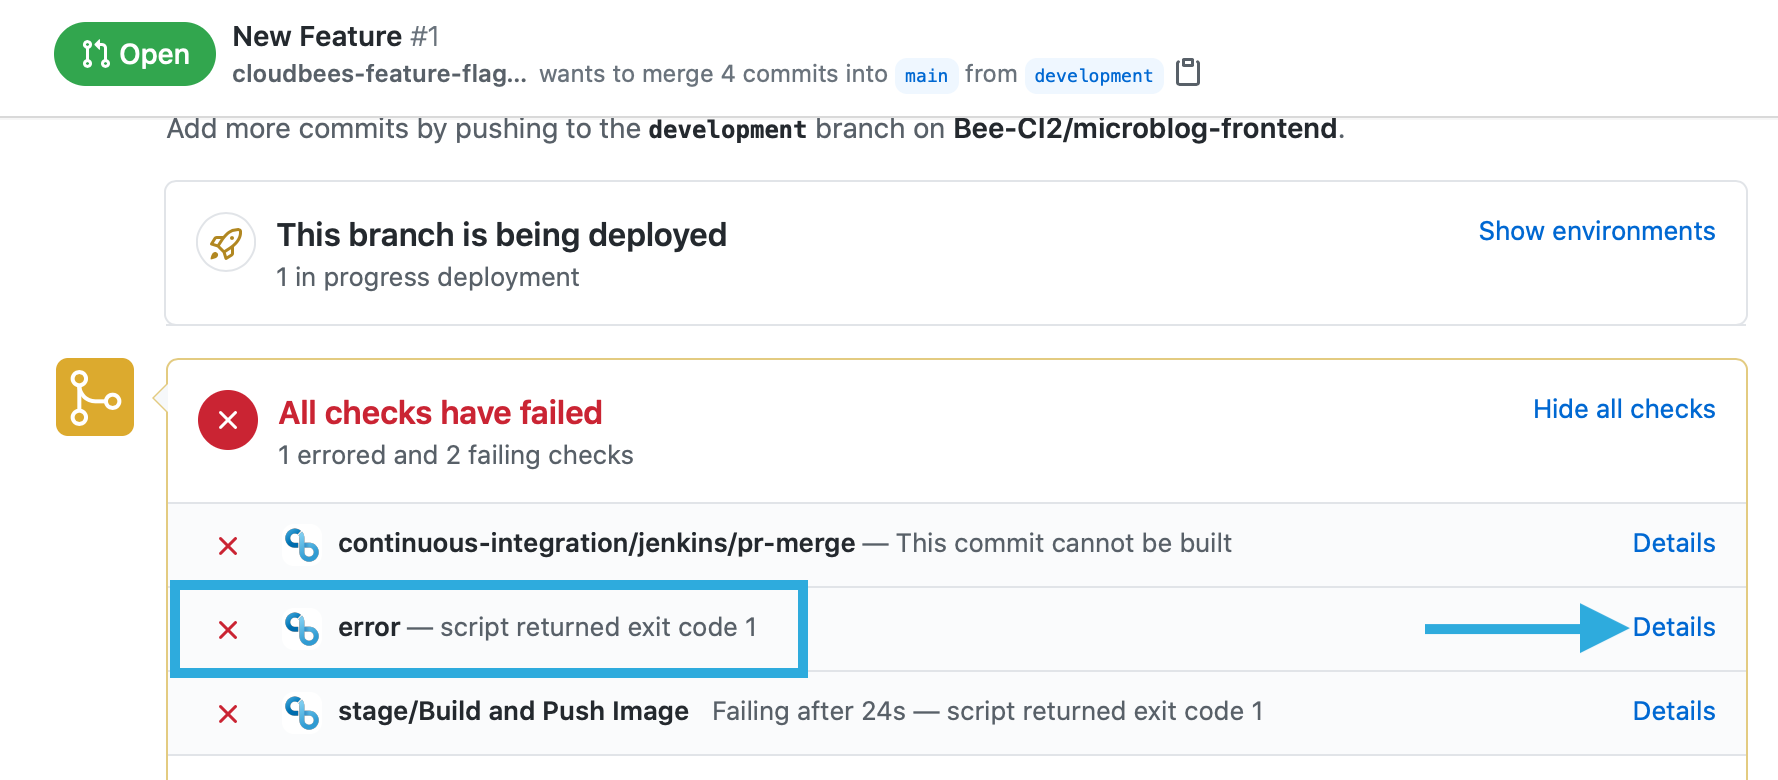
- On the Open pull requests screen you will see that there is a CloudBees CI build in process.

- IMPORTANT: If your build ends with any errors then click on the Details link for the error check.
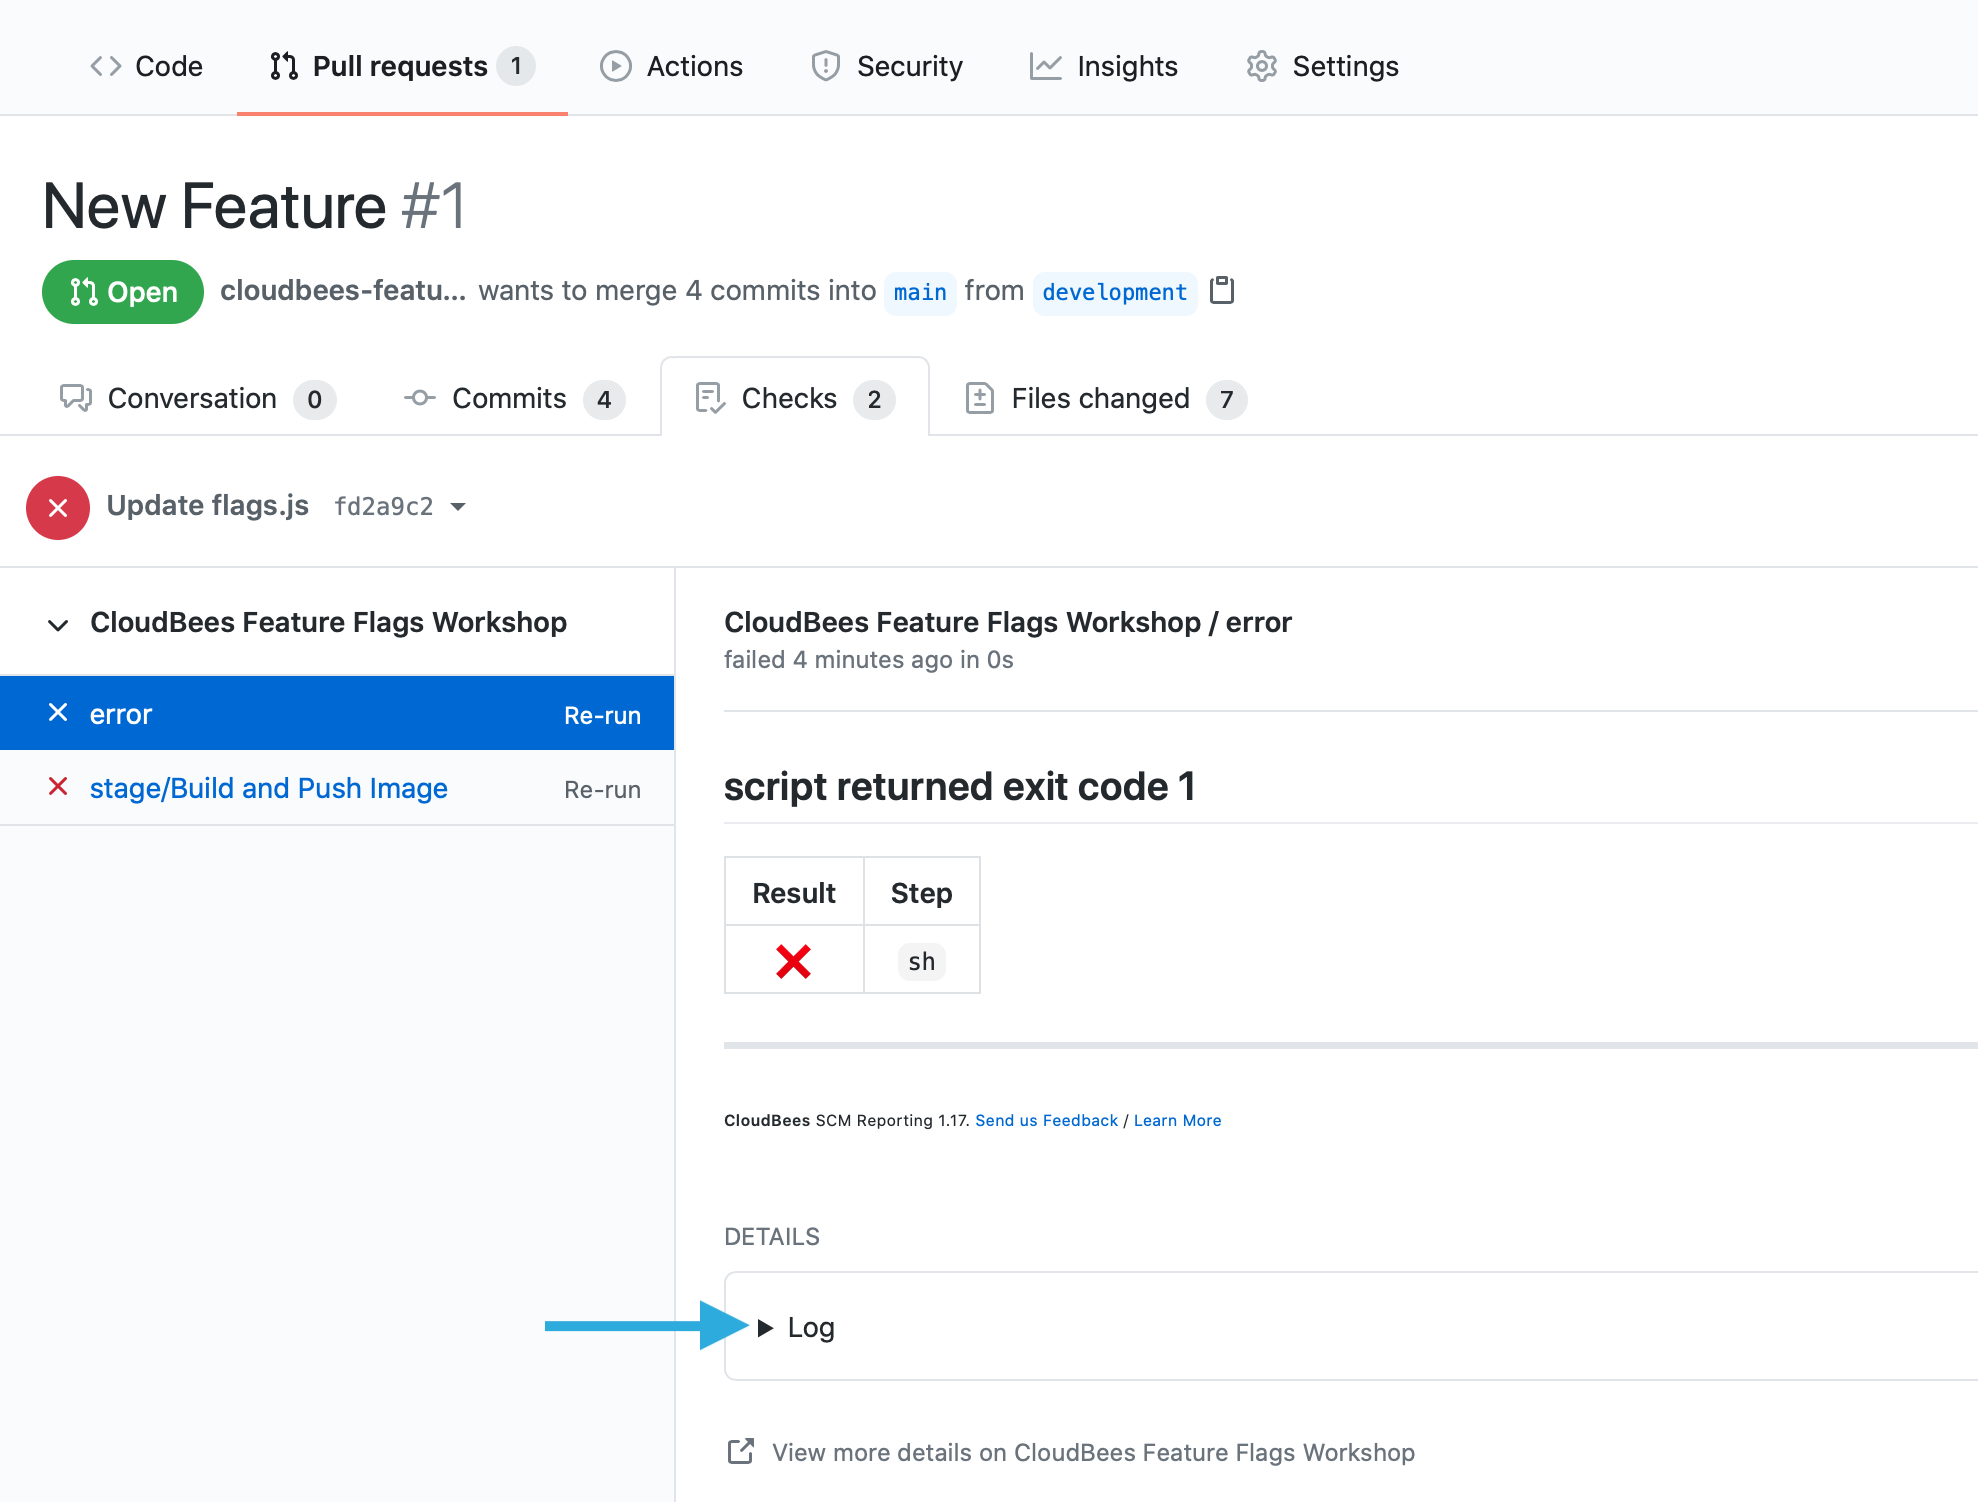
- In the Checks view, with the error check selected, expand the Log under DETAILS.
- Scroll down and, in this example, you will see that we forgot a comma in the /src/utils/flags.js file.
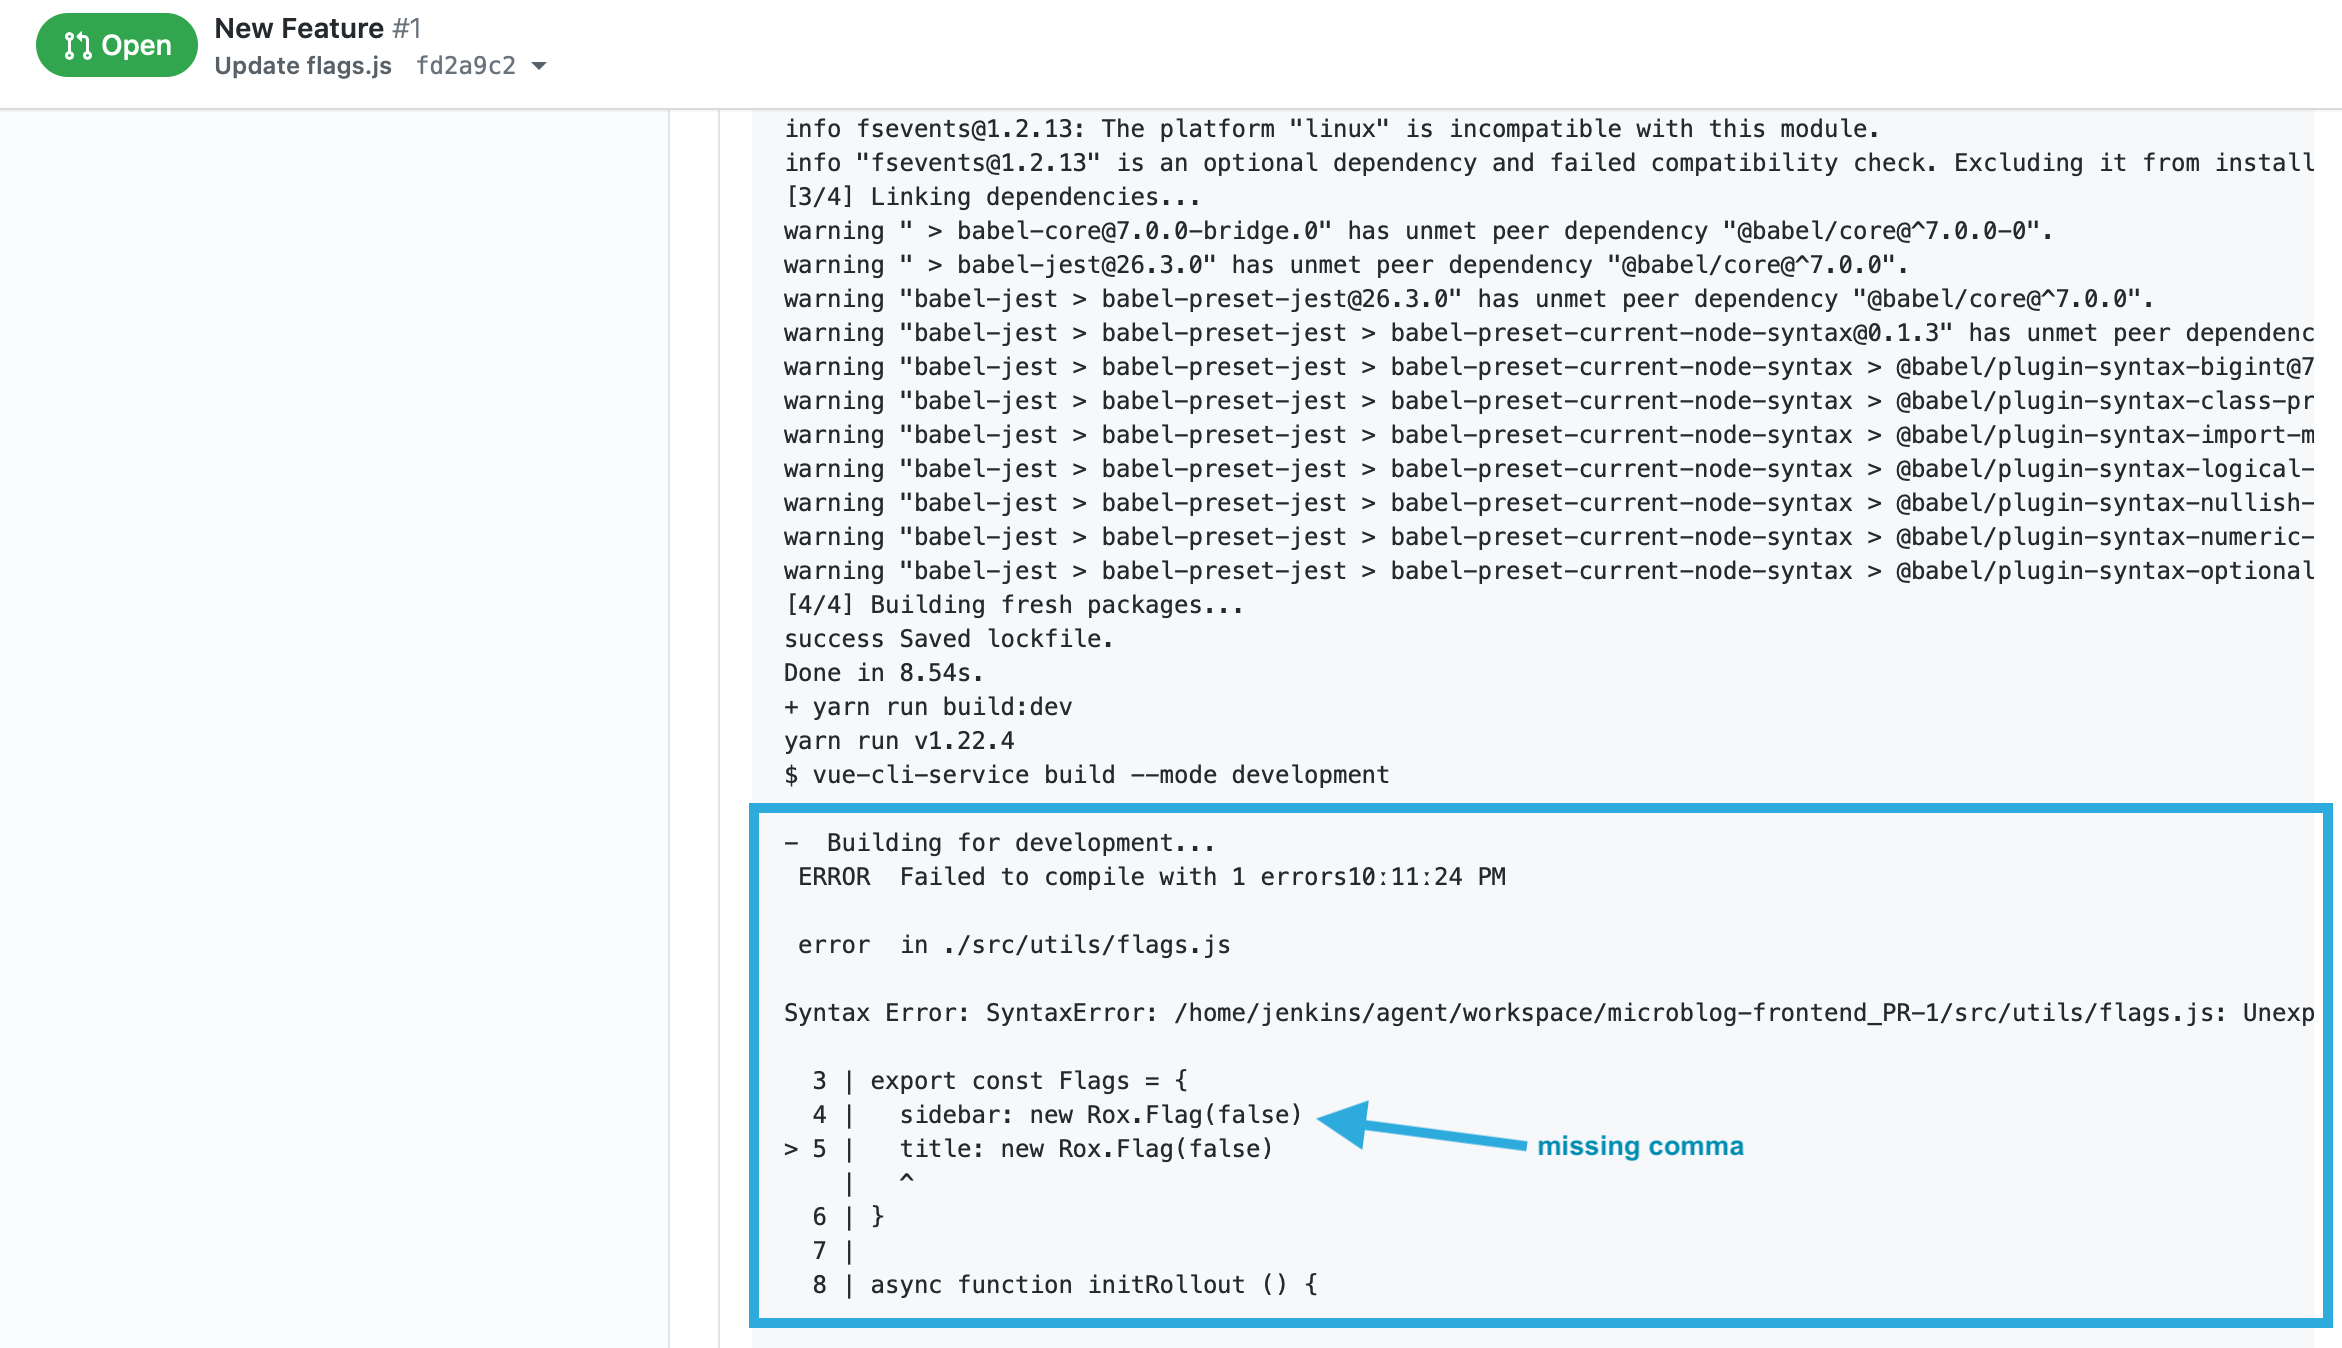
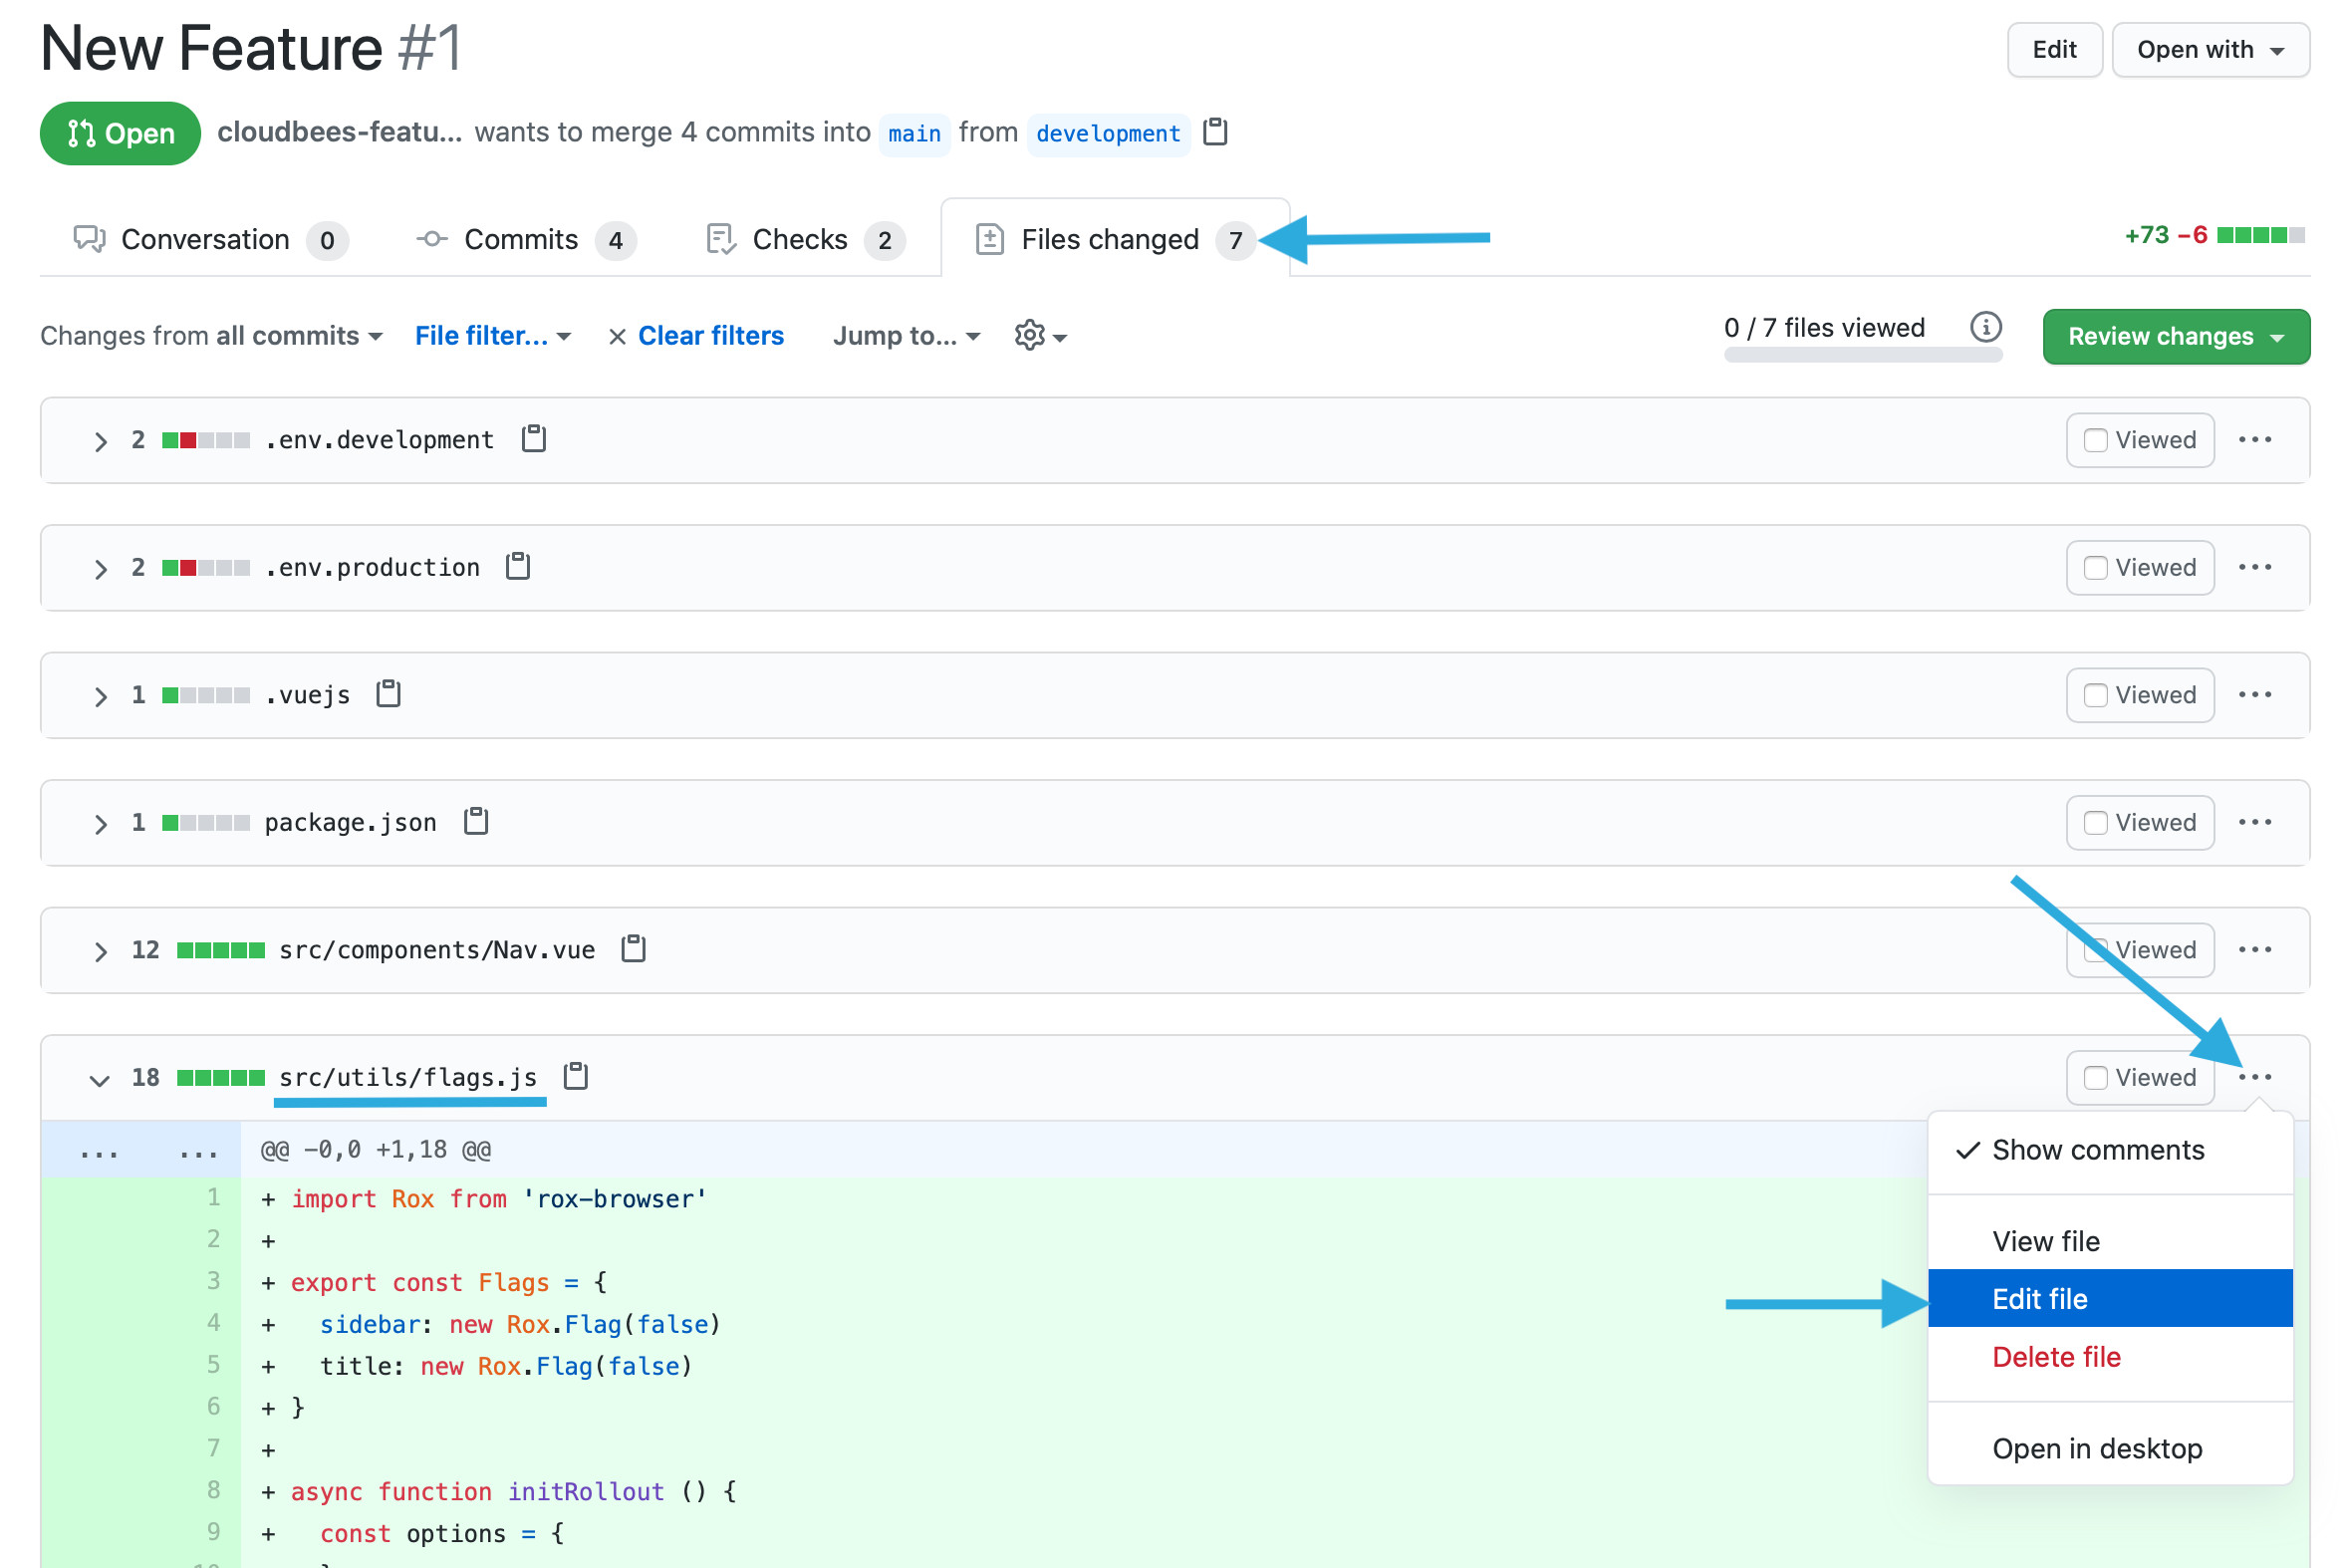
- To fix the syntax error click on the Files changed tab, scroll down to the flags.js file, then click on the 3 dots to bring up the menu to access and click the Edit file link.
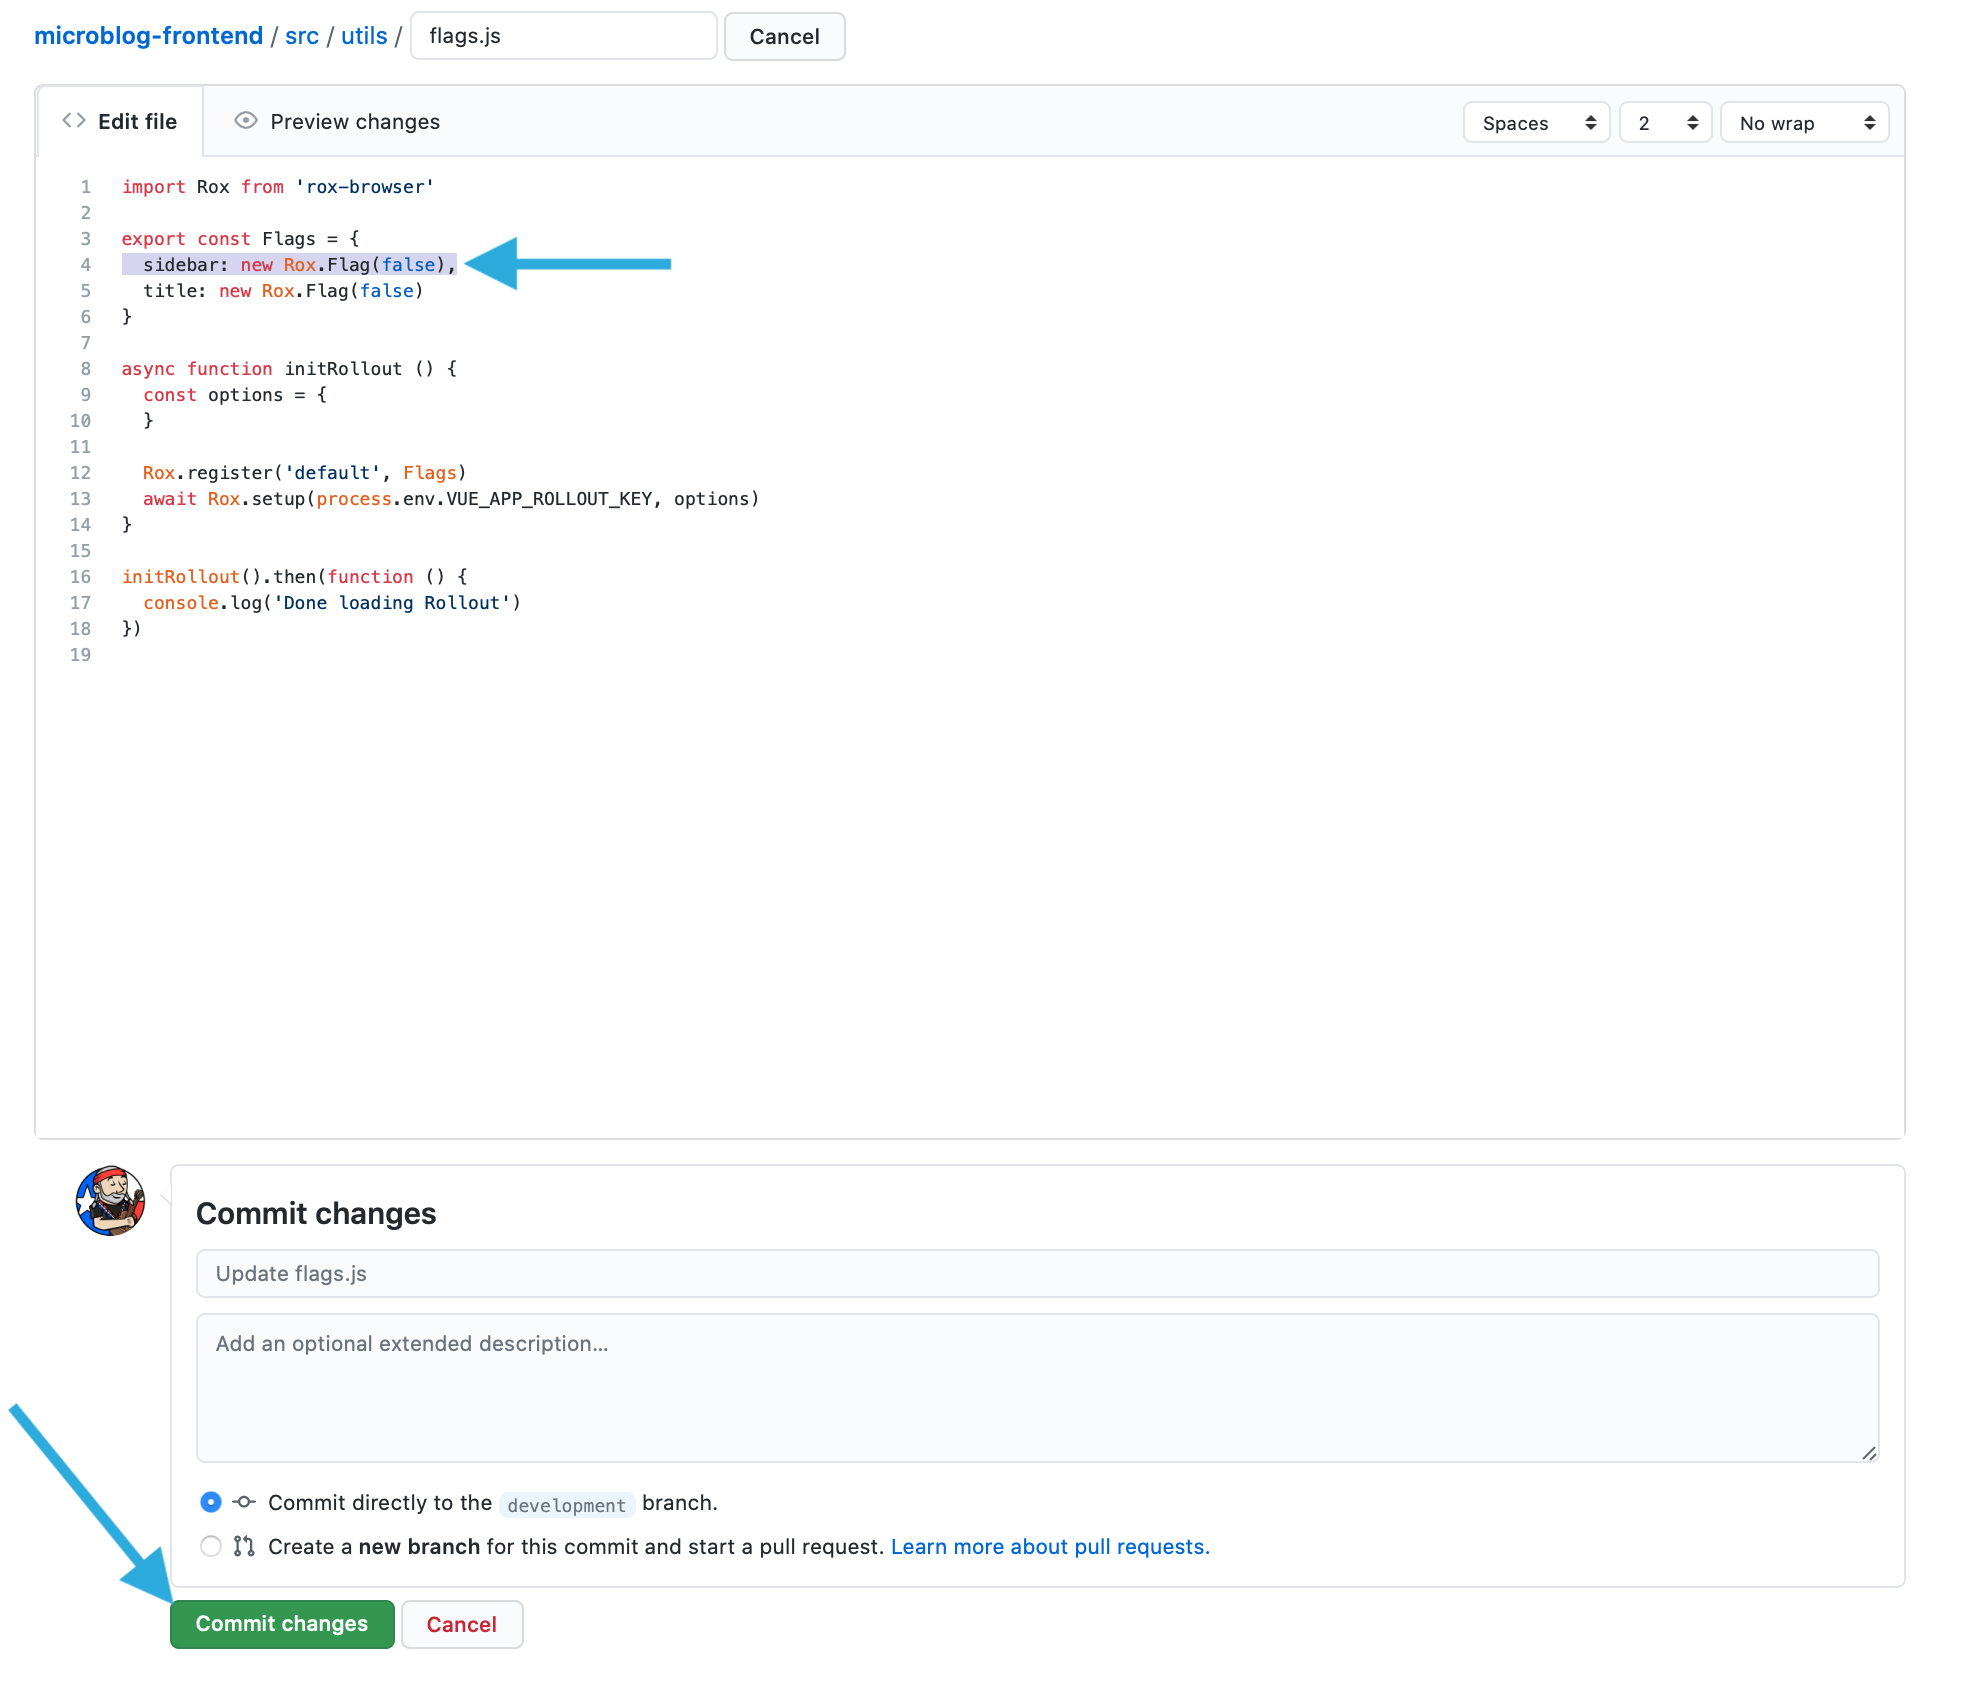
- Fix the error, in this case adding a comma after sidebar: new Rox.Flag(false), and then click the Commit changes button.
- Navigate back to the Checks view and you will see a new build was triggered.

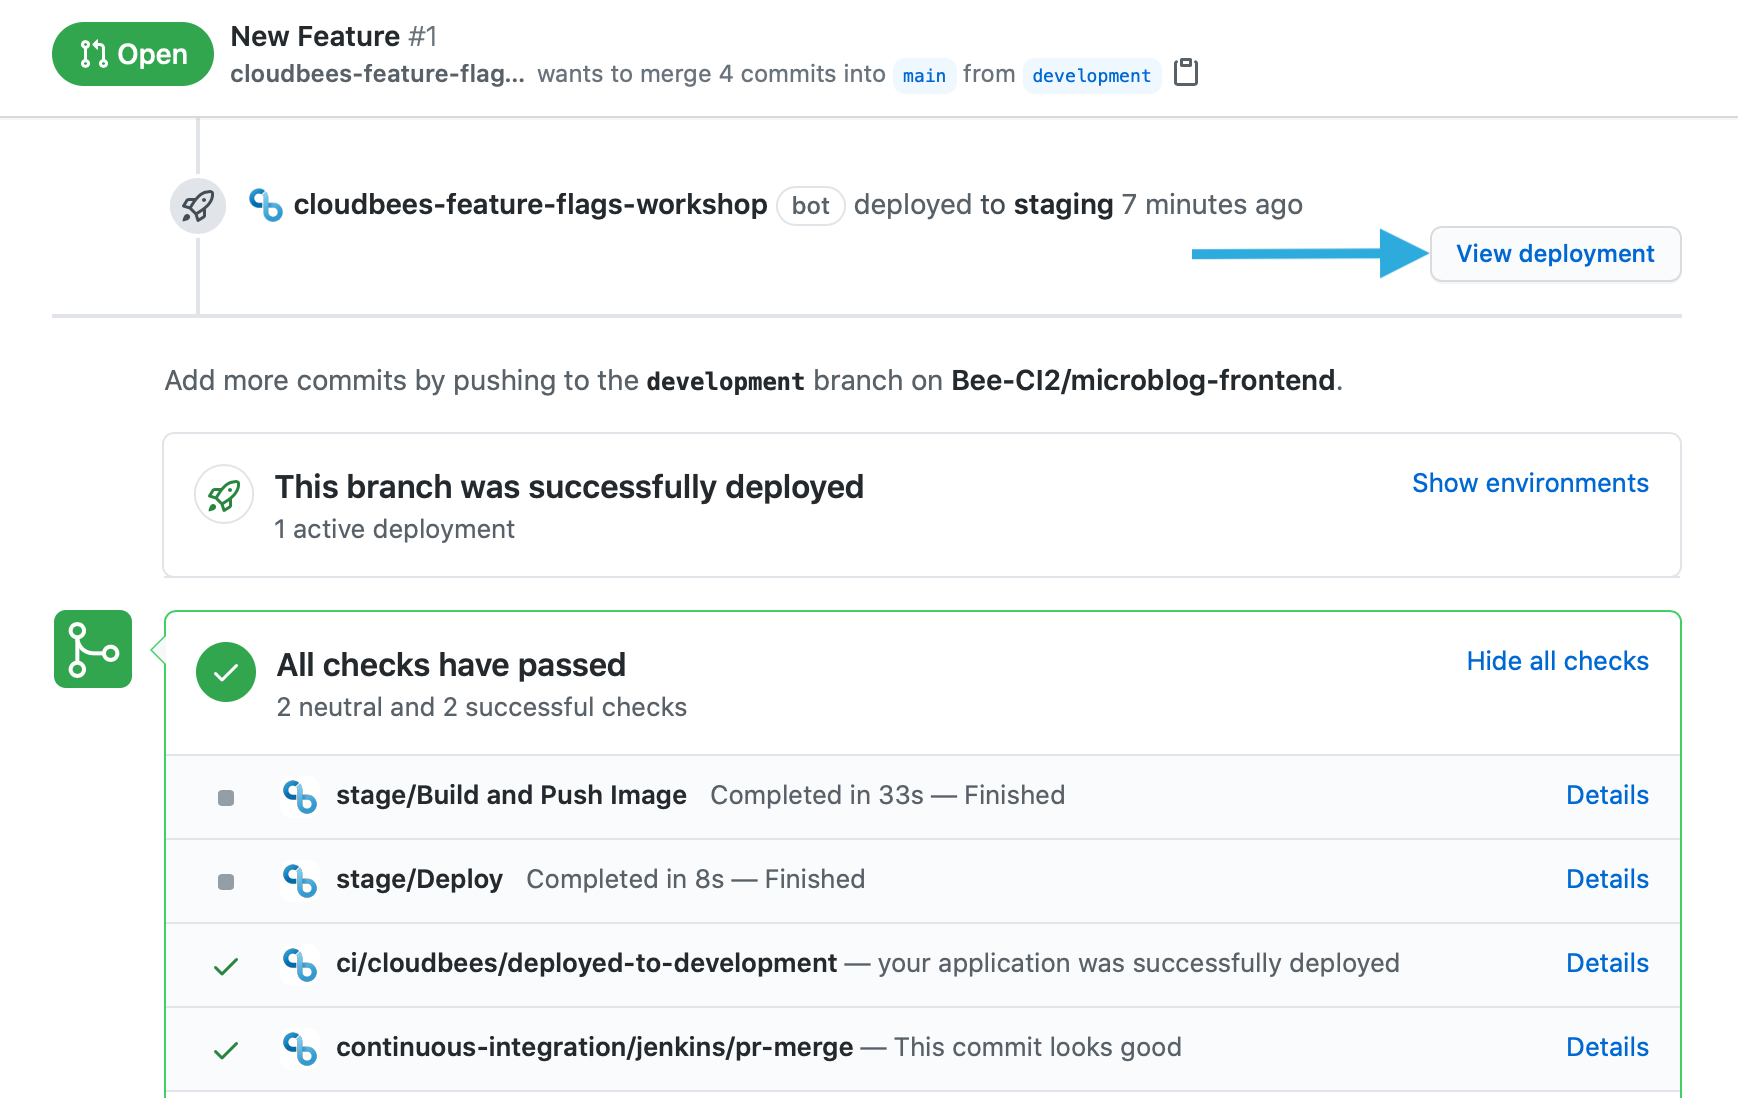
- Once the build completes you should see that your error is fixed.
- IMPORTANT: If your build ends with any errors then click on the Details link for the error check.
- Once the build has finished successfully you will see the branch deployed to the staging environment, click on the View deployment button.
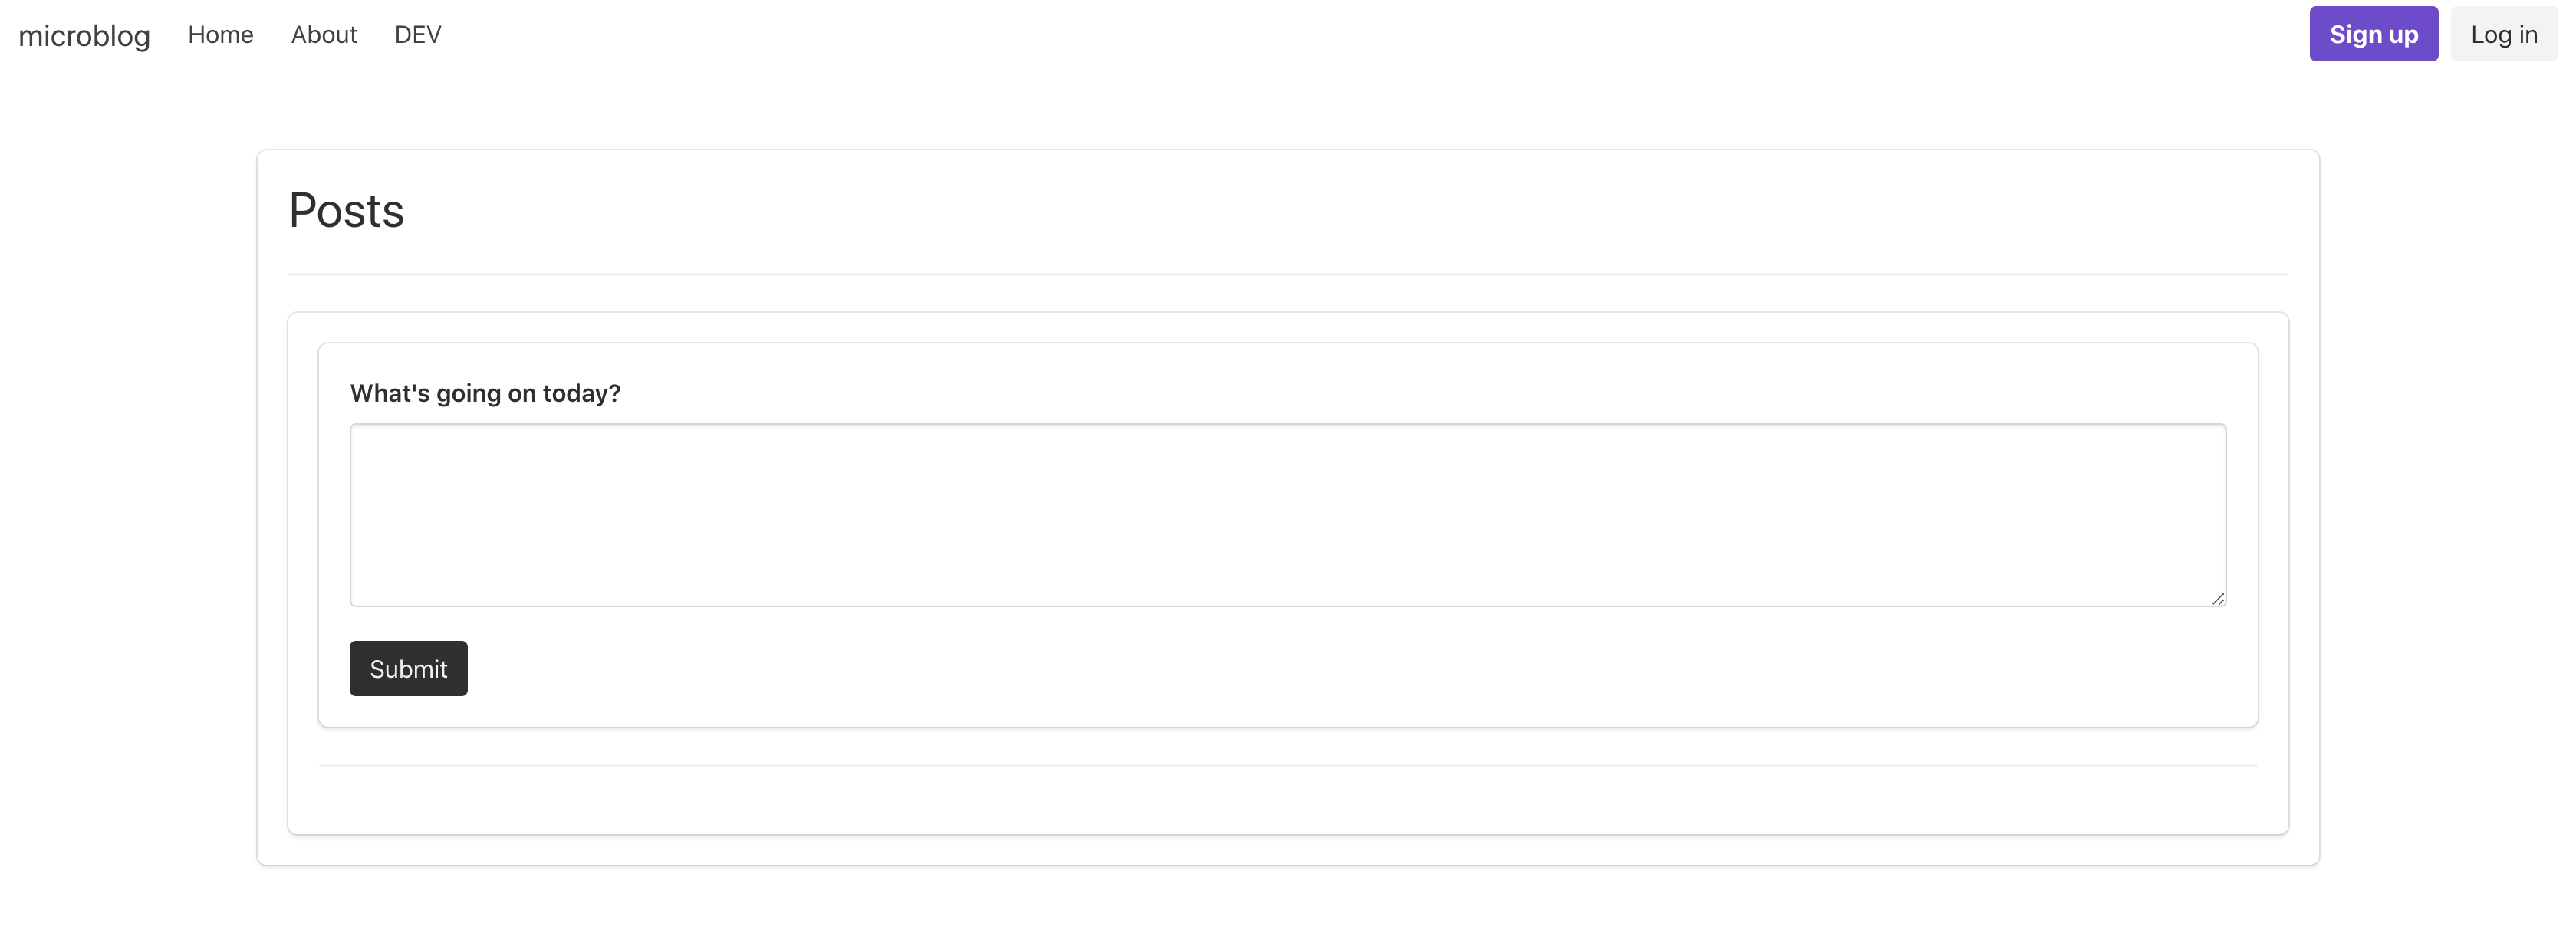
- This is the microblog frontend application.
Checking Communication with CloudBees Feature Management
- In your browser, switch to CloudBees Feature Management dashboard.
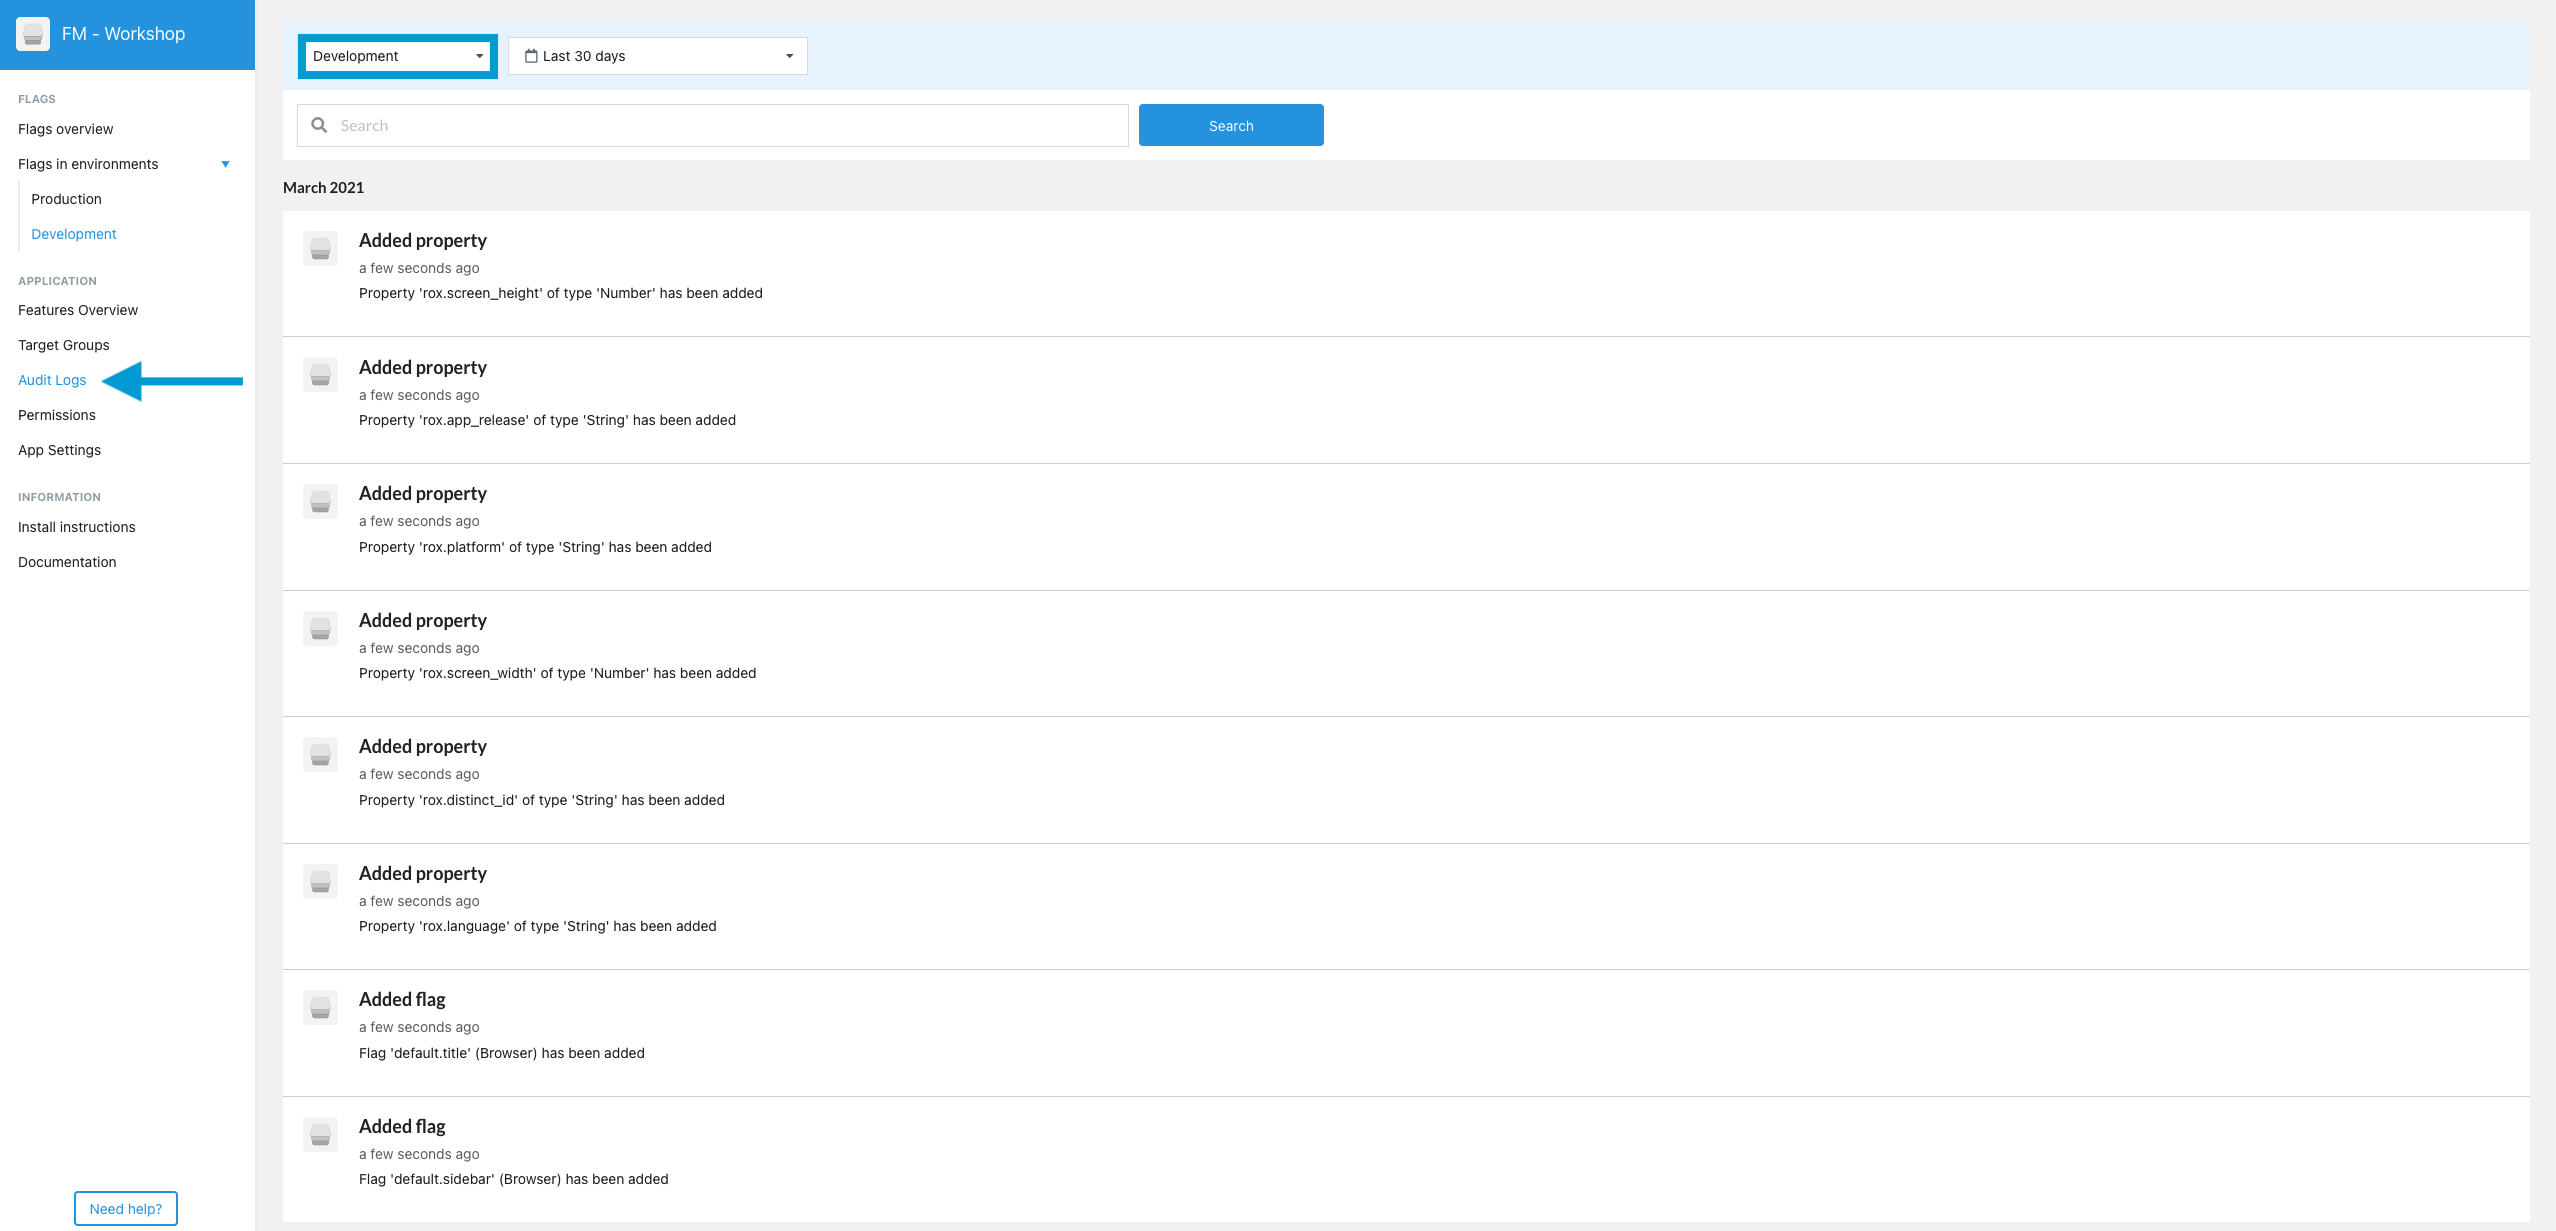
- On the left-hand side of the dashboard, select the Audit Logs view.
- You should see both the title and sidebar flags have been added to the default namespace and communicated from the development code. This means they are available for remote configuration in the dashboard! There are also some default properties that have been added, but we’ll add more in a future lab.
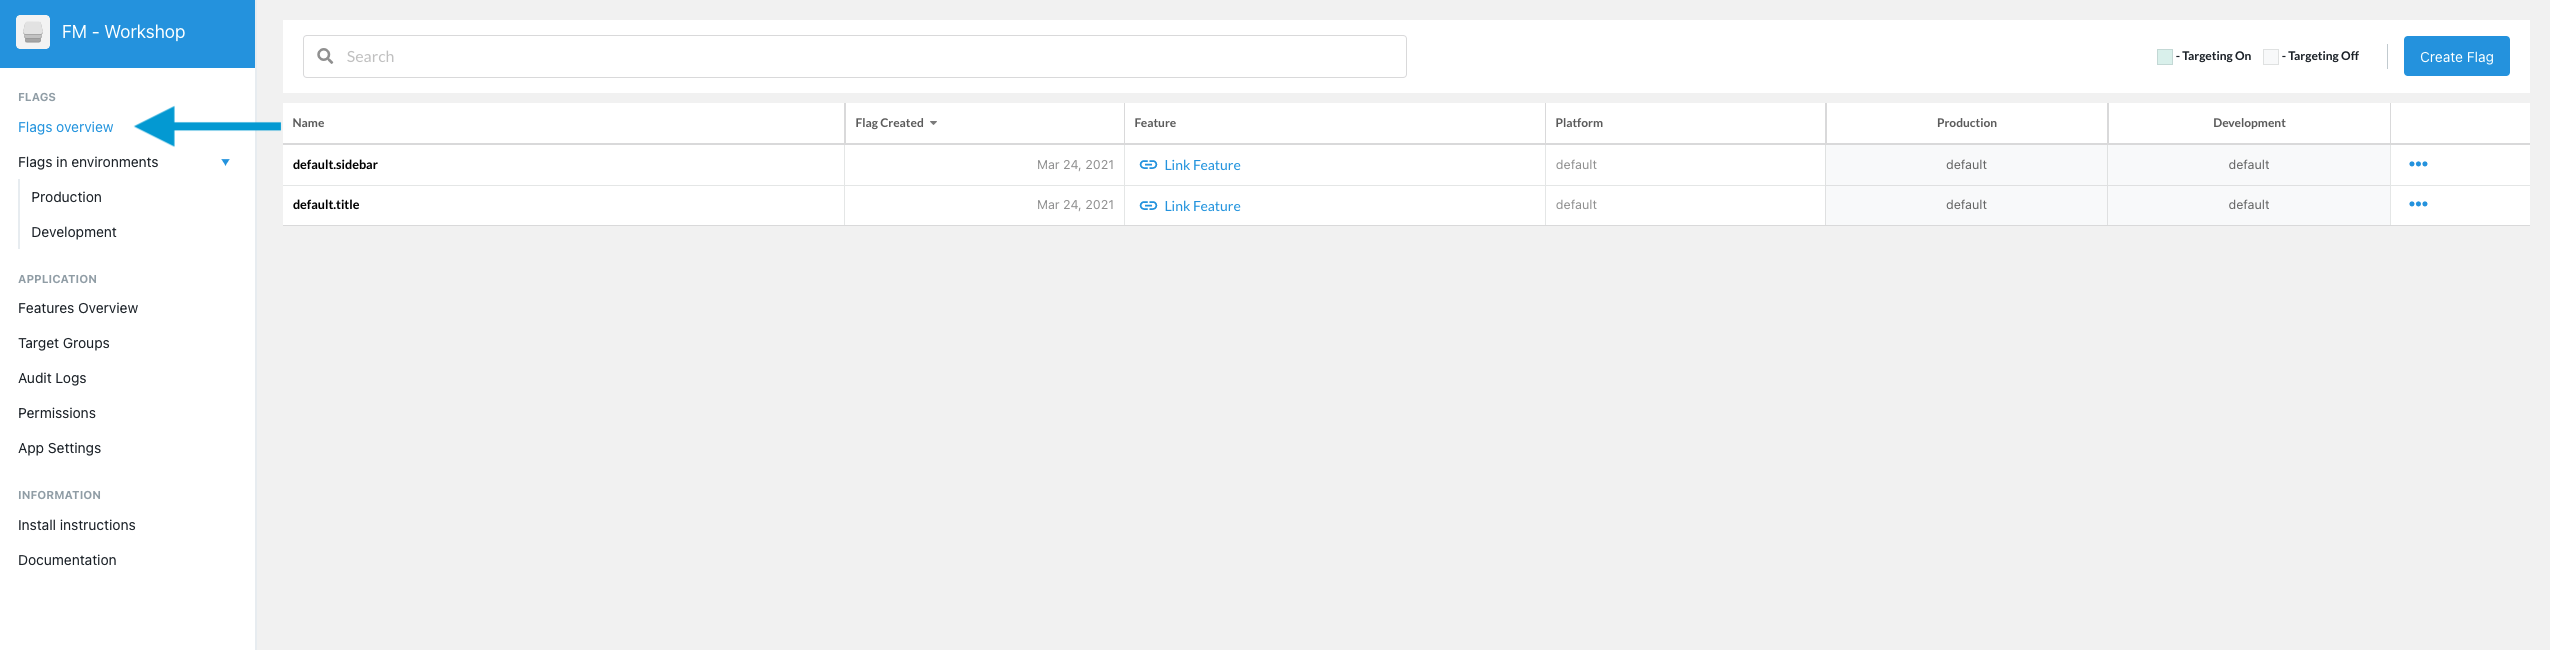
- Finally, click on Flags overview in the left menu and you will see the two flags from your flag.js file, and an outline of their configurations (though we have none yet) defined across all environments.
Lab 1 Completed!
Congratulations! You have finished Lab 1!